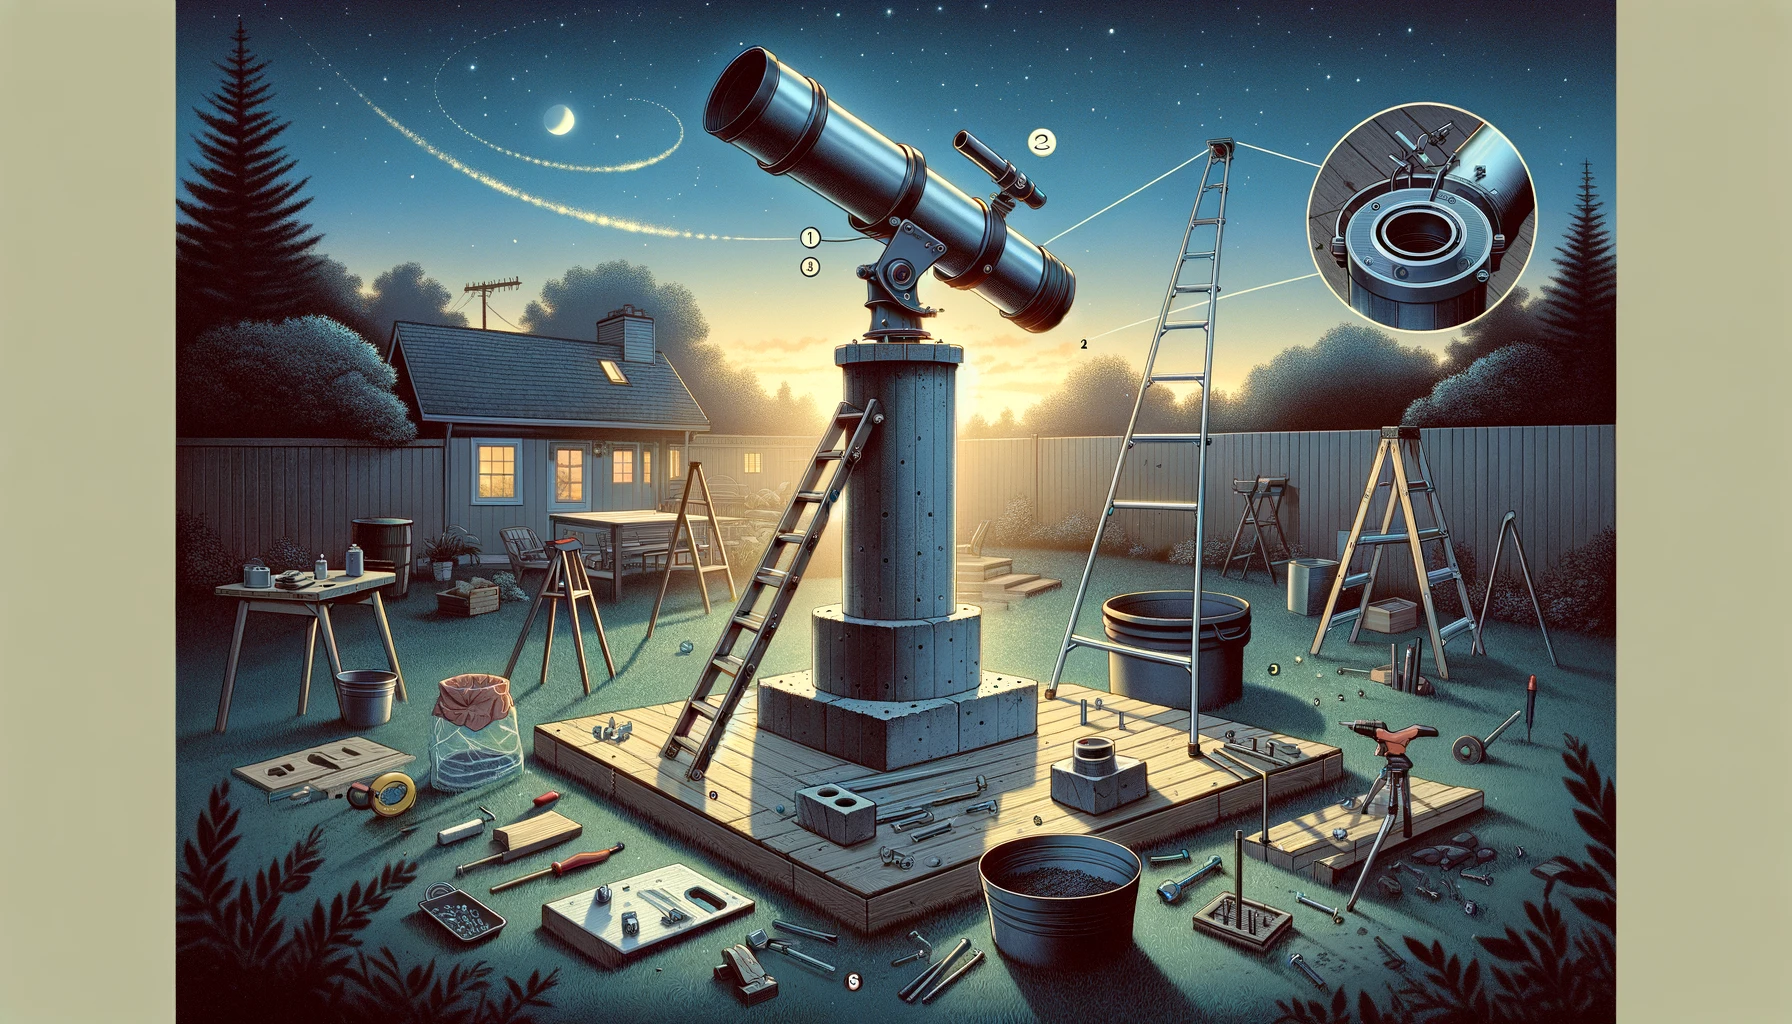
How To Build A DIY Telescope Pier?
Building a DIY telescope pier offers astronomers numerous advantages in terms of stability, customization, and cost-effectiveness.
Author:Xander OddityReviewer:Dr. Felix ChaosphereFeb 14, 2024116.1K Shares1.8M Views
Telescope piers serve as stable platforms, anchoring telescopes firmly to the ground and minimizing vibrations, crucial for achieving clear, precise astronomical observations.
Unlike traditional tripod setups, piers provide a permanent, immovable base that can significantly enhance the quality of visual and photographic astronomy by ensuring consistent alignment and reducing setup time for each observation session.
The benefits of such stability become especially apparent in astrophotography, where even the slightest movement can blur images of celestial objects.
Opting for a DIY approach to constructing a telescope pier, as seen in the detailed creation of a breeze block pier, offers several advantages.
It allows customization to meet specific needs, such as height or material preferences, while also being cost-effective. DIYers can tailor their piers to their equipment, ensuring a perfect fit and optimal functionality.
Planning And Designing Your Telescope Pier
When planning and designing a telescope pier, several crucial considerations come into play to ensure the project's success.
The location is paramount; it should offer clear night sky visibility, minimal light pollution, and a stable foundation to prevent any movement that could disturb the telescope's alignment. It's also vital to consider the surrounding environment to avoid obstructions like trees or buildings.
Material choice significantly impacts the pier's effectiveness and durability. Metal and concrete are popular options, each with its pros and cons.
Metal piers, often made from steel or aluminium, are strong and resistant to vibrations, but they require proper treatment to prevent rust and corrosion. Concrete piers, on the other hand, offer exceptional stability and durability, making them a favoured choice for permanent installations.
These factors combined—the ideal location, appropriate height, and material choice—determine the pier's overall effectiveness, enhancing the quality of astronomical observations by providing a stable and reliable setup.
A well-designed pier, tailored to the user's specific needs and environmental conditions, can significantly improve the experience of stargazing and astrophotography, making every celestial observation more rewarding.
Materials And Tools Required
Materials
- High-quality ready-mix concrete for the pier's foundation, ensuring long-term stability.
- Depending on your choice, metal for a fabricated pier or breeze blocks for a masonry pier. The latter offers a cost-effective, sturdy option.
- Galvanized or stainless steel M10 bolts, washers, and nuts for securing the structure. M12 bolts and washers may also be required for attaching additional components.
- Waterproof paint to protect the pier and enhance its appearance.
- For additional bonding strength between the blocks.
- 9mm sheets for creating a wooden sleeve around the pier, providing a smooth surface and aesthetic finish.
- Depending on the pier design, mixing with concrete or securing blocks.
Tools
Drill: With a 12mm masonry bit for breeze blocks and metal drill bits for any metal components.
Mixer: For concrete or cement, ensure a consistent, lump-free mix.
Level: Ensuring the pier is perfectly vertical is crucial for accurate telescope alignment.
Wrenches: Securing the pier's components firmly together for tightening bolts and nuts.
Paintbrushes: For applying masonry paint to the blocks and the wooden sleeve.
Trowel: For applying and smoothing cement or concrete.
Measuring Tape: For precise measurements during construction, ensure the pier meets your requirements.
Building The Foundation
Site Preparation: Remove any rocks, rubbish, or plants from the area. Ensure the foundation is big enough to hold the pier and offer stability by marking its perimeter with stakes and string.
Digging: Excavate the marked area to a depth suitable for your climate and soil type. For most locations, a 24-30 inches depth is sufficient to surpass the frost line and ensure stability.
Creating a Mold: Construct a form out of lumber to define the foundation's shape and dimensions. This mould holds the concrete in place as it sets and should be built to match your pier foundation's desired height and width.
Pouring Concrete
- A consistent, pourable mixture should be achieved by mixing the concrete according to the manufacturer's directions.
- Before pouring, ensure the mould is level and securely in place.
- Pour the concrete slowly, filling the mold to the top.
- Use a piece of wood or a concrete float to spread the concrete evenly, removing any air pockets.
Levelling: After filling the mould, level the concrete's surface with a screed board, moving it back and forth across the top of the mold. This process ensures a flat surface crucial for the pier's stability.
Curing: Allow the concrete to cure for at least 48-72 hours before mould removal. Concrete may take more time to cure in colder weather or if quick-set concrete is not utilized, as these factors depend on the concrete mix and the weather.
Constructing The Pier Column
For Breeze Blocks
Layout
- Start by laying the first block on the cured concrete foundation.
- Use a level to ensure it sits perfectly horizontally.
- Apply Gorilla Glue on the sides that will bond with the next blocks to enhance stability.
Stacking
- Place the next blocks atop the first, staggering the joints like bricks for increased strength.
- Check alignment with a level after adding each block.
- Drill through the blocks if necessary to insert metal rods or rebar for additional stability, filling the voids with concrete.
Securing: To anchor the column to the foundation, insert M10 bolts into pre-drilled holes filled with epoxy or cement. These bolts should connect the foundation to the bottom block, ensuring the column doesn't shift.
Finishing: Once the column reaches the desired height, apply masonry paint for weather protection and aesthetic appeal. A wooden sleeve or decorative elements can be added for a more polished look.
For Metal
Base Plate: Using bolts, begin with a metal base plate anchored to the concrete foundation. This plate should match the bottom of your metal pier and include holes for anchoring bolts.
Column Assembly
- Weld or bolt the metal column to the base plate, ensuring it's perfectly vertical.
- Use a magnetic level to check alignment.
- For bolted connections, apply thread-locking fluid to prevent loosening over time.
Bracing: Consider welding or bolting diagonal braces between the column and the base plate for additional stability. This step is particularly important for taller piers or those in windy areas.
Rust Prevention: Coat the metal with a rust-inhibitor paint or sealant to protect against weathering, focusing on welds and joints where corrosion often starts.
Attaching The Mounting Plate
Selection of Mounting Plate: Choose a mounting plate compatible with your telescope mount. The plate should have pre-drilled holes that align with the mounting points on your telescope mount. You may need to drill additional holes in the plate to ensure compatibility.
Preparing the Pier Top: Ensure the top surface of the pier is flat and clean. For breeze block constructions, this might involve adding a final layer of concrete or a custom-cut piece of plywood to create a smooth, level surface.
Positioning the Plate: Place the mounting plate on the top of the pier. Use a spirit level to check that the plate sits perfectly level. You can use shims under the plate to achieve the necessary leveling if adjustments are needed. This step is crucial for the accurate alignment of your telescope.
Securing the Plate: After the plate is level, make marks on the top surface of the pier to indicate where the bolt holes will be. Remove the plate and drill holes at the marked positions to accommodate the anchoring bolts. You might weld the plate in place for metal piers, ensuring it remains level during the process.
Attaching the Plate
- Place the mounting plate back on top of the pier, aligning the holes in the plate with those in the pier.
- Insert the bolts through the plate and into the pier.
- Fasten the bolts from the underside using nuts and washers for extra stability.
- Tighten the bolts evenly to avoid shifting the plate from its levelled position.
Final Adjustments: Re-check the level of the mounting plate once all bolts are tightened. To make small changes, release the bolts, use shims to fix them, and then tighten them fully.
Mount Attachment: With the mounting plate securely and levelly attached, you can affix your telescope mount to the plate according to the manufacturer's instructions.
Cabling And Accessories Installation
Conduit Use
- Employ PVC conduits to protect cables from weather and potential damage.
- Install these conduits along the pier or bury them underground if your cabling runs from a distance.
- Ensure the conduit is sealed at entry and exit points to prevent moisture ingress.
Cable Management: Use cable ties or clamps inside the pier to keep power and data cables organized and prevent tangling. This approach facilitates easy troubleshooting and replacement of cables if needed.
Weatherproof Connectors: Opt for weatherproof connectors for all external cable connections. These connectors prevent moisture from damaging the cables and ensure a reliable power and data transfer connection.
Accessories Installation
Shelves: Attach shelves to the pier for accessories like eyepieces, cameras, and other observing essentials. Ensure these shelves are securely mounted and positioned for easy access during observing sessions.
Storage Compartments: For storing larger accessories or protective covers, consider building or attaching a lockable storage compartment at the base of the pier. This compartment can also house power supplies or battery packs, protecting them from the elements.
Cable Ports: Install cable ports on shelves or storage compartments to run cables neatly to your devices. This keeps the setup organized and reduces the risk of cable damage.
Weatherproof Covers: Use weatherproof covers or small enclosures to protect electronic accessories. These can be particularly useful for power strips, junction boxes, or any sensitive equipment mounted on or near the pier.
Finishing And Aesthetic Touches
Painting And Sealing
Masonry Paint: Apply a coat of high-quality masonry paint to breeze blocks or concrete piers. This paint provides a waterproof barrier, protecting the material from moisture and temperature variations. Choose a colour that blends well with your surroundings or adds a distinctive look to your observatory.
Metal Sealer: For metal piers, after any rust-proofing treatment, apply a metal sealer or paint designed for outdoor metal structures. This layer prevents rust and can be matched to your telescope or outdoor decor.
Clear Sealant: The paint and the underlying substance can be protected against moisture and ultraviolet radiation for a longer period by applying a transparent sealer to painted surfaces.
Decorative Elements
Capstones: Adding a capstone to the top of a breeze block pier can provide a polished look and serve as a smooth, level base for the mounting plate. Choose a stone or synthetic cap that complements the pier's design.
Edging and Landscaping: Surround the base of your pier with decorative edging or stones to integrate it seamlessly into your garden or backyard. Landscaping can help conceal cables or conduits running to the pier and add to the overall aesthetic of your observing area.
Lighting: Installing low-voltage, ambient lighting around the pier can enhance safety and create a visually appealing setup. Opt for red LED lights to preserve night vision during observing sessions.
Custom Signage: Consider adding signage or plaques to your pier, such as naming your observatory or indicating the pier's construction date. This personal touch adds character and pride to your astronomical setup.
Safety Considerations And Best Practices
- Always wear appropriate PPE, including safety goggles, gloves, and sturdy footwear, to protect against injuries from tools, materials, and debris.
- Familiarize yourself with all tools before use, especially power tools like drills and mixers. Ensure tools are in good condition and used according to the manufacturer's guidelines.
- Use proper lifting techniques or seek assistance when handling heavy materials like breeze blocks or large metal components to avoid back injuries.
- When using adhesives, sealants, or paints, work in a well-ventilated area and wear a mask if recommended. Follow all product safety instructions to prevent skin and respiratory issues.
Best Practices For Long-term Maintenance
Regular Inspections: Conduct periodic pier inspections for signs of wear, structural integrity, and stability. Pay special attention to areas prone to water damage or rust.
Weatherproofing: Maintain the pier's weatherproofing by reapplying sealant or paint as needed. This is particularly important for outdoor piers exposed to varying weather conditions.
Bolt Tightening: Check and tighten any bolts or fasteners annually to ensure the pier and the mounting plate remain secure. This prevents wobbling or misalignment of the telescope.
Cable Management: Regularly inspect power and data cables for wear or damage. Replace any frayed or damaged cables to prevent electrical hazards.
Pest Control: If the pier is in an area prone to pests, inspect for signs of infestation and take appropriate measures to protect the structure and electrical components.
Debris and Vegetation: Keep the area around the pier clear of debris and overgrown vegetation that could harbour moisture or pests. This not only maintains a safe environment but also ensures unobstructed access.
FAQs
What Are The Benefits Of Using A Telescope Pier Over A Traditional Tripod?
A telescope pier offers enhanced stability, reduced vibrations, and permanent alignment, improving observational accuracy and convenience.
Can I Use Any Concrete For The Pier Foundation?
It's best to use high-quality ready-mix concrete designed for outdoor use, ensuring durability and stability over time.
How Do I Ensure The Telescope Pier Is Vertically Aligned?
During construction, use a plumb line, laser, or spirit level to check the pier's alignment. Adjustments should be made as needed to ensure perfect verticality.
What Materials Are Recommended For Constructing A Telescope Pier?
Breeze blocks or metal (steel or aluminium) are popular choices, offering different benefits in terms of durability, cost, and ease of construction.
How Can I Protect My Telescope Pier From Weather Damage?
Apply masonry paint for concrete piers and a rust-inhibitor for metal piers. Regular maintenance and reapplication of protective coatings are recommended.
What Regular Maintenance Should Be Performed On A Telescope Pier?
Conduct periodic inspections for structural integrity, tighten bolts and fasteners, maintain weatherproofing, and check electrical components for safety.
Conclusion
Building a DIY telescope pier offers astronomers numerous advantages in terms of stability, customization, and cost-effectiveness.
By carefully planning and designing the pier's location, material, and height, observers can create a stable platform that minimizes vibrations and ensures consistent alignment for precise astronomical observations.
Whether opting for a breeze block or metal construction, the construction process involves meticulous attention to detail, from laying the foundation to securing the mounting plate.
Jump to
Planning And Designing Your Telescope Pier
Materials And Tools Required
Building The Foundation
Constructing The Pier Column
Attaching The Mounting Plate
Cabling And Accessories Installation
Accessories Installation
Finishing And Aesthetic Touches
Safety Considerations And Best Practices
Best Practices For Long-term Maintenance
FAQs
Conclusion

Xander Oddity
Author
Xander Oddity, an eccentric and intrepid news reporter, is a master of unearthing the strange and bizarre. With an insatiable curiosity for the unconventional, Xander ventures into the depths of the unknown, fearlessly pursuing stories that defy conventional explanation. Armed with a vast reservoir of knowledge and experience in the realm of conspiracies, Xander is a seasoned investigator of the extraordinary.
Throughout his illustrious career, Xander has built a reputation for delving into the shadows of secrecy and unraveling the enigmatic. With an unyielding determination and an unwavering belief in the power of the bizarre, Xander strives to shed light on the unexplained and challenge the boundaries of conventional wisdom. In his pursuit of the truth, Xander continues to inspire others to question the world around them and embrace the unexpected.

Dr. Felix Chaosphere
Reviewer
Dr. Felix Chaosphere, a renowned and eccentric psychiatrist, is a master of unraveling the complexities of the human mind. With his wild and untamed hair, he embodies the essence of a brilliant but unconventional thinker. As a sexologist, he fearlessly delves into the depths of human desire and intimacy, unearthing hidden truths and challenging societal norms.
Beyond his professional expertise, Dr. Chaosphere is also a celebrated author, renowned for his provocative and thought-provoking literary works. His written words mirror the enigmatic nature of his persona, inviting readers to explore the labyrinthine corridors of the human psyche.
With his indomitable spirit and insatiable curiosity, Dr. Chaosphere continues to push boundaries, challenging society's preconceived notions and inspiring others to embrace their own inner tumult.
Latest Articles
Popular Articles